How to Integrate Apple Pay into Your App
- Updated: Aug 27, 2024
- 5 min
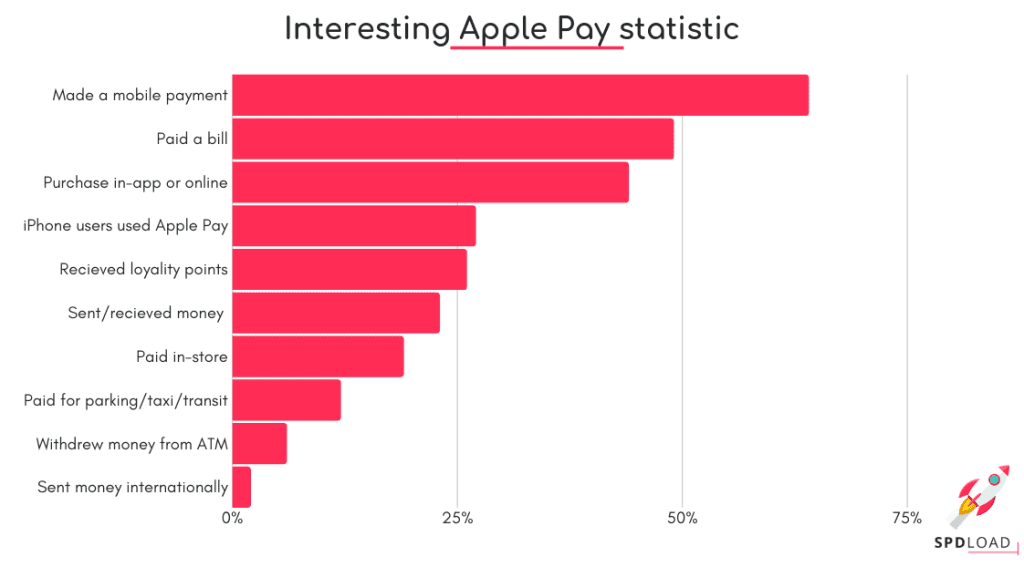
Today Apple Pay accounts for 70% of the world’s card payment transactions, making the Apple payment gateway a must-have for any digital business.
Additionally, it allows you to accept overseas payments since this service is available in over 20 countries. So what are you waiting for?
Let us show you how you can implement Apple Pay onto your own mobile application.
Thinking of adding a card payment option on your website? Discover the best options for accepting card payments on your website in our step-by-step guide on how to accept card payment on-site.
Elevate your brand with our custom website development and design services — let's build your dream site together!
Why Integrate Apple Pay
As noted above, Apple Pay is a leader in the credit card payment market. It’s a simple one-touch way to make online payments, and its simplicity helps increase your customers’ satisfaction rate. Especially if we talk about your MVP in business.
In Q3 of 2019, Apple reported record profits of almost 54$ billion. This number was led by services, like Apple Pay, showing just how huge their market is! At the moment 90% of all contactless payments in the USA are made by Apple.
- It’s commonly integrated into apps. In 2019 alone 10 billion contactless payments were made using Apple Pay.
- It’s popular, with over- 253 million people already using this payment method.
Benefits For Users
- Guaranteed security. According to statistics, 50% of users are concerned about the security of their personal data, which is a good reason to set up Apple Pay! It uses device-specific numbers and codes, meaning it is almost impossible to copy.
- It helps you create an easy and quick user experience for your customers, and it’s one of the best ways to accept credit cards on your phone seamlessly from around the world. A smooth one-click payment transaction is so much better than empty text inputs to enter credit card data. Especially, when you would need to save your details on the website in order to have a one-click payment on your return. In 2019 it’s essential that you are implementing the best features since requirements stage as user expectations are a lot higher these days.
Integrating Apple Pay: A Step-by-Step Guide
I’ve used a React Native framework for front-end and Laravel development tools and resources for back-end. The general workflow to implement Apple Pay is as follows:
- Create a Merchant account.
- Set up an Apple Pay configuration for the project in your Xcode.
- Then go to iTunes Connection. There you will need to create a sandbox user.
- Add a test card.
- Create a test request to make a payment.
- Handle the result.
However, the details are a little more complicated. Below we will outline step by step how to set up Apple Pay:
1. Create an account to enable Apple Pay in your mobile application. Follow the official setup steps.
 2. Next set up your server, not forgetting to first check out the official requirements.
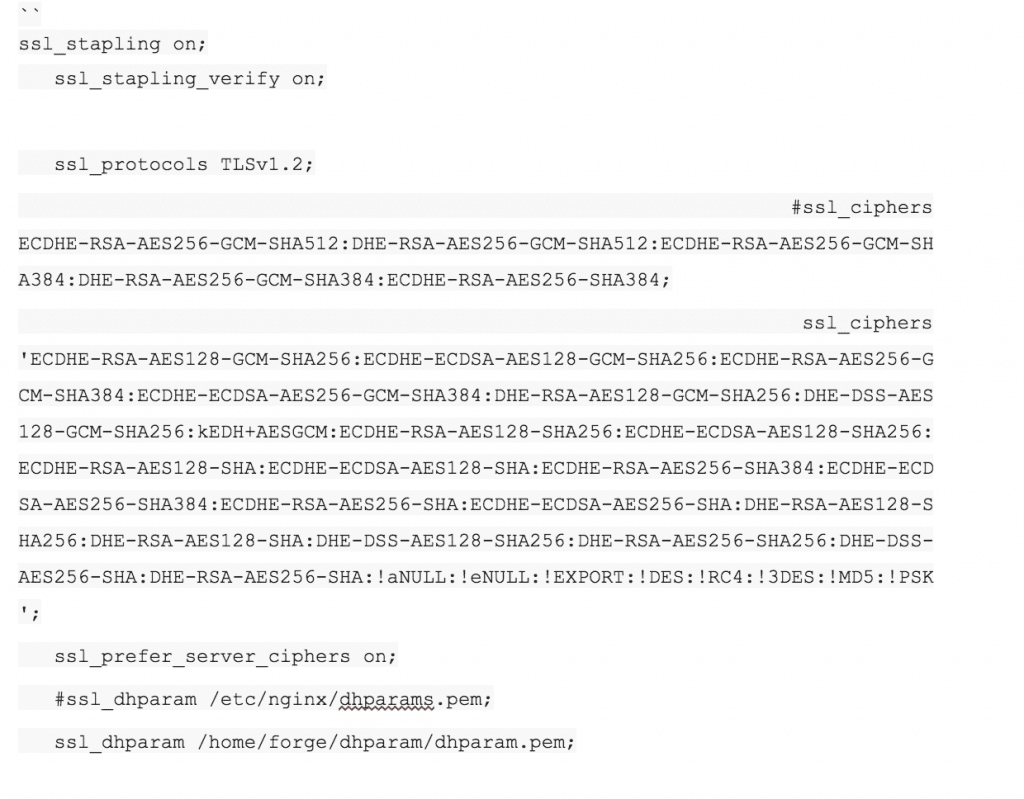
In the server configuration file, you will need to add one of the possible Cipher Suite referenced above. Take a look at our example configuration for Nginx.
3. Next, you need to set up your work environment. As always, check the official requirements first.
 4. Here is an example of how to add the Apple Pay payment button.
Using the v-if directive you can check whether you have successfully installed Apple Pay sessions and whether users can now make payments using Apple Pay.
5. Now let’s create a certSigninRequest.certSigninRequest:
- Open Keychain Access on your Mac (located in Applications/Utilities).
- Open Preferences and click Certificates. Make sure both the Online Certificate Status Protocol and Certificate Revocation List are set to Off.
- Choose Keychain Access > Certificate Assistant > Request a Certificate Authority. N.b. If you have your private key selected when you do this, the CSR won’t be accepted. Make sure you do not have a private key selected. Next, enter your user email address and user name. Use the same address and name that you used to register in the iOS Developer Program. A CA Email Address is required.
- Select the option “Save to disk” and “Let me specify key pair information” and click Continue.
- Specify a file name and click Save.
6. After Signing in you can register for your Apple Pay Developer account at https://developer.apple.com/
7. Go to menu “Certificates, IDs & Profiles”. 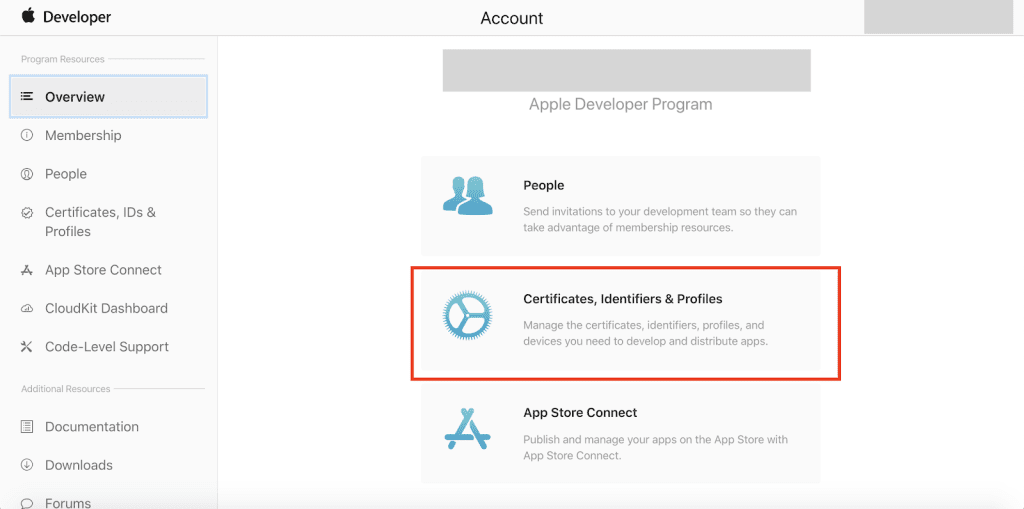
8. Click on the button ‘add new certificate’. 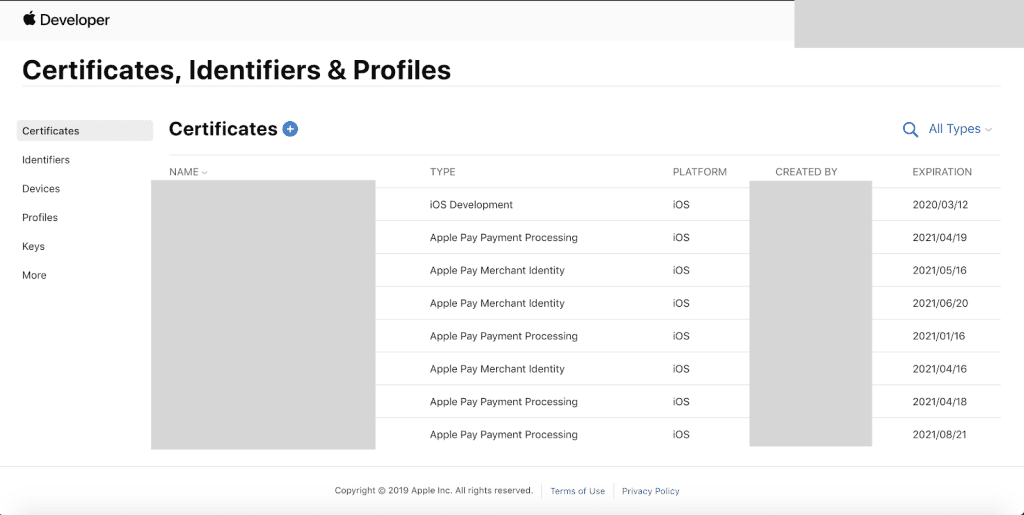
9. Then choose the options Apple Pay Merchant Identity Certificate. 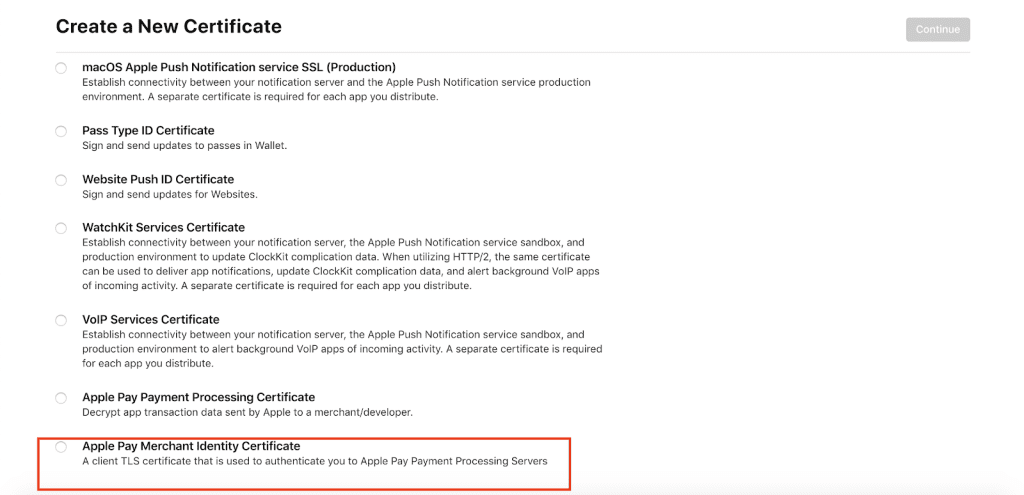
10. Now choose the required Merchant from the list of those currently available. 
11. Go to menu “Identifiers” and filter by Merchant IDs. 
12. Choose the previously created Merchant.
13. Next, create an Apple Pay Payment Processing Certificate. 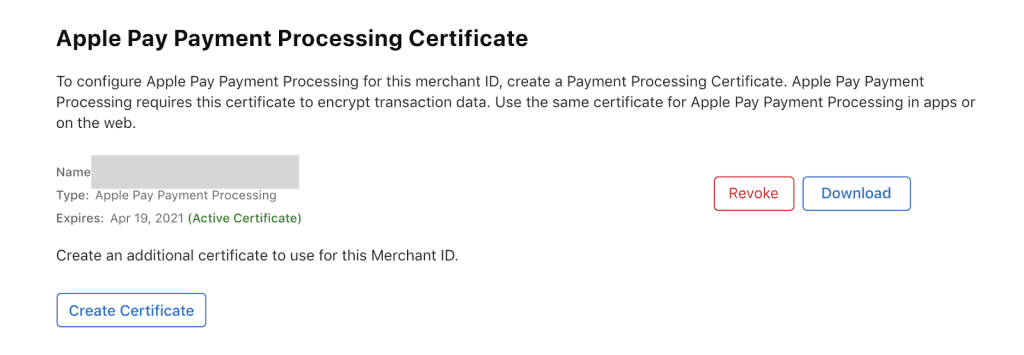
14. After the creation of a certificate, you will need to upload the .csr extension which is an ECC encrypted file. We receive this file from our payment system (in our example we work with the bank, so screen made there) 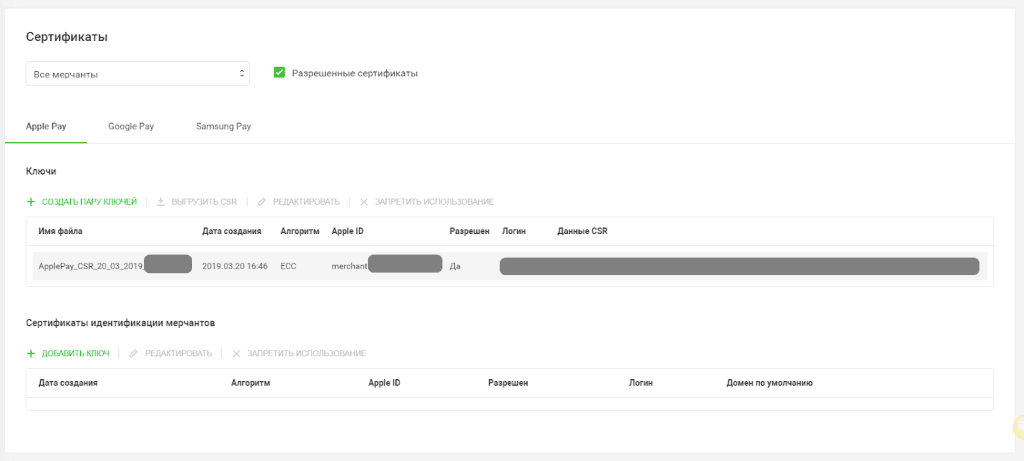
15. Add and verify the domain, following the instructions on the screen. Pay attention every time you renew an SSL Certificate, as you will need to verify the domain each time. 
16. If you missed step 5 go back and take a look at how to create a certSigninRequest.certSigninRequest. If you haven’t created one yet, now is the time using encryption RSA:2048.
17. Download your previously created certSigninRequest.certSigninRequest and then download merchant_id.cer.
18. Import received merchant_id.cer in Keychain (it required to export file in .p12).
Expertise gap? Let's bridge it together. Share your needs and elevate your team with our experts.
19. In category Certificates in Keychain, you need to export the certificate using format .p12.
20. Generate merchantIdentityCert from the received file using the command below:openssl pkcs12 -in your_cer_name.p12 -out you_key_cert_name.pem -clcerts.
21. Enter the password that was entered during export merchant_id.cer in .p12.
22. Enter PEM pass phrase – this will be the key to the generated merchantIdentityCert.
23. Put the generated merchantIdentityCert in the project’s folder.
24. Use merchantIdentityCert in the body of the request for validation Apple Pay Session.
25. Example of the request where we see: 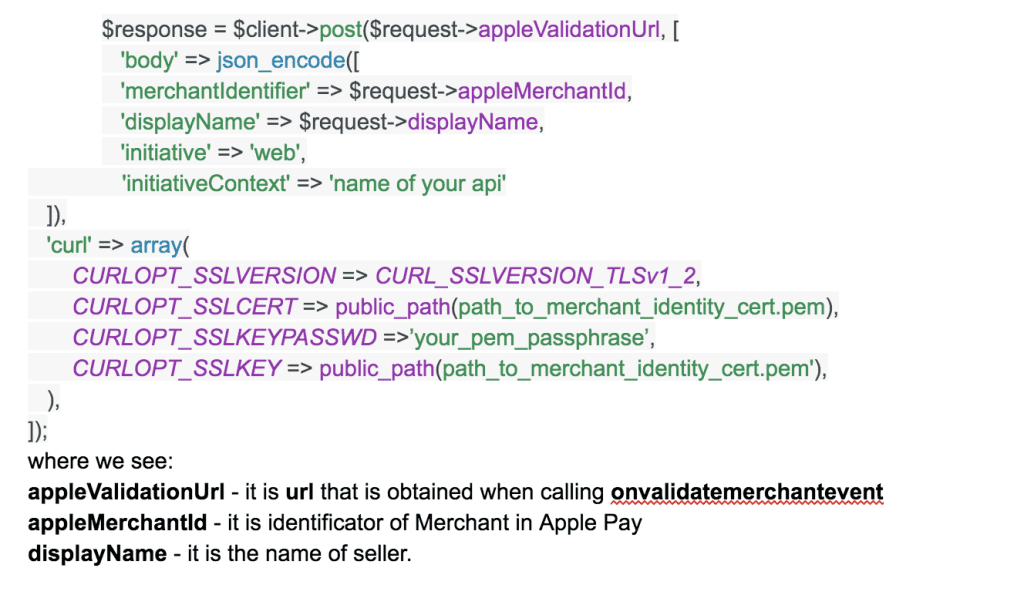
- Use the answer to complete Merchant validation. Take a look:
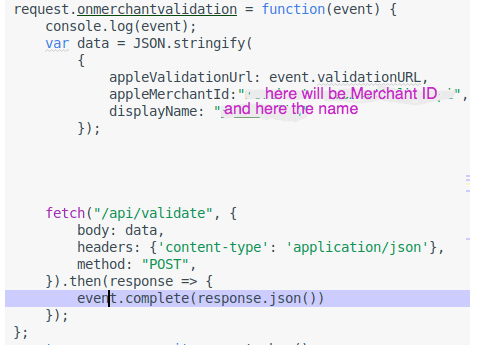
27. Create the Apple Pay button in accordance with the requirements here in the section “Display an Apple Pay button”
28. Code listing in Apple Pay using Payment Request API 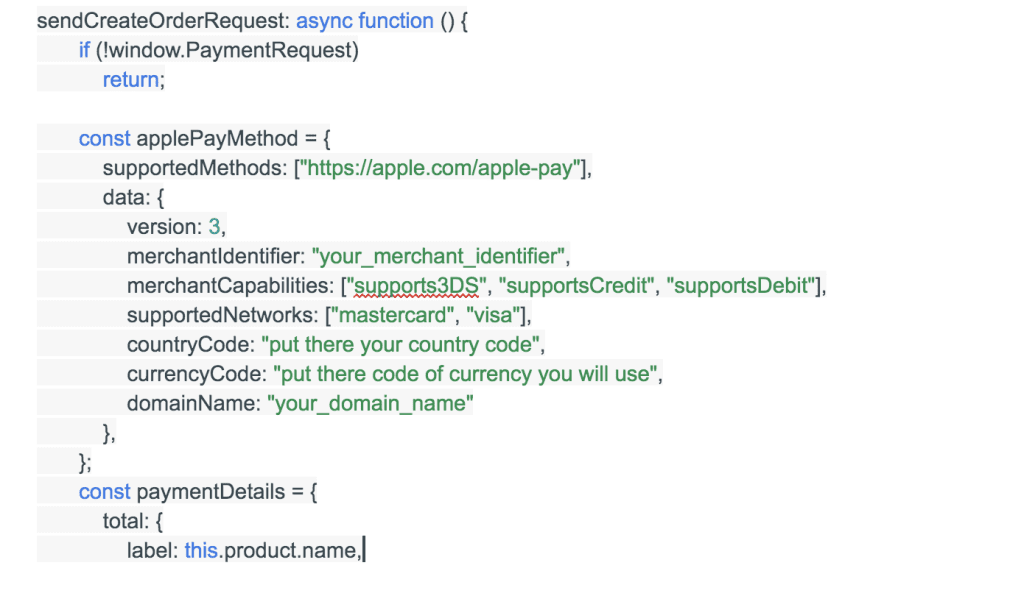


Summary
Connecting Apple Pay in the application is a pain point for many developers. There are too many reasons why it’s actually a pain! The lack of clear guidelines is the main one. As well as complicated requirements by Apple.
That’s why SpdLoad’s team is happy to share with you our expertise in implementing Apple Pay.
It saves you a it saves you a huge amount of resources and boosts up your own in-house development level.
The main challenge you may face is adopting our guideline to your personal requirements. Such as different payment gateways.
We would be happy to help you with development of your application!
Feel free to ask questions, comment, and share.
We hope you enjoy it!
To learn more about iOS development, take a look at these best iOS development tools.


