How to Build a Price Comparison Website: A Step-by-Step Guide
- Updated: Nov 12, 2024
- 15 min
Are you a product manager, startup founder, or serial entrepreneur interested in creating your own price comparison site?
In this article, you’ll find answers to key questions like:
- How much does it cost to develop a price comparison site?
- What does the development process look like?
- What tech stack and team do you need?
- How do you find a reliable development partner?
Plus, we have a bonus infographic that visually outlines step-by-step instructions on creating a price comparison site.
Keep reading for need-to-know details that will save you time and prepare you to create an effective, user-friendly site.
Need a rough timeline? The average time to create a website offers a solid reference.
Elevate your brand with our custom website development and design services — let's build your dream site together!
Price Comparison Website Market Overview
Owning a price comparison online platform is synonymous with hitting a goldmine. Numerous statistics support this opinion, and we’ll be sharing some of them here:
- Over 25% of all age groups in the UK use price comparison tools at least once a week.
- 90% of electronics buyers check for the best price on the internet before making a decision.
- 78% of respondents in a survey stated that they’d rather purchase a product from a third-party online store for less.
The statistics above show that this sector enjoys significant consumer support mainly because of its convenience.
As such, it’s undoubtedly a sector that can give your startup immense profit.
Things to Know Before Starting a Price Comparison Site
With hundreds of tech products coming up regularly, you must take concise steps to guarantee top-notch product acceptability within your preferred target market.
A great way to achieve your desired objective is by offering a unique price comparison service. What do we mean? Add an appealing innovation to your service.
Here are some tips to making your product stand out:
- Have a unique business model
- Use a distinct comparison strategy
- Offer access to a unique market
We know that this can seem extremely vague or trivial. That’s why we’ve prepared an in-depth guide on how to create outstanding product value for a startup.
Employing the above tips can make your platform achieve impressive feats in no time. However, to optimally engage these tips, then you should first know the cost implication.
Below is the cost of creating a comparison site. 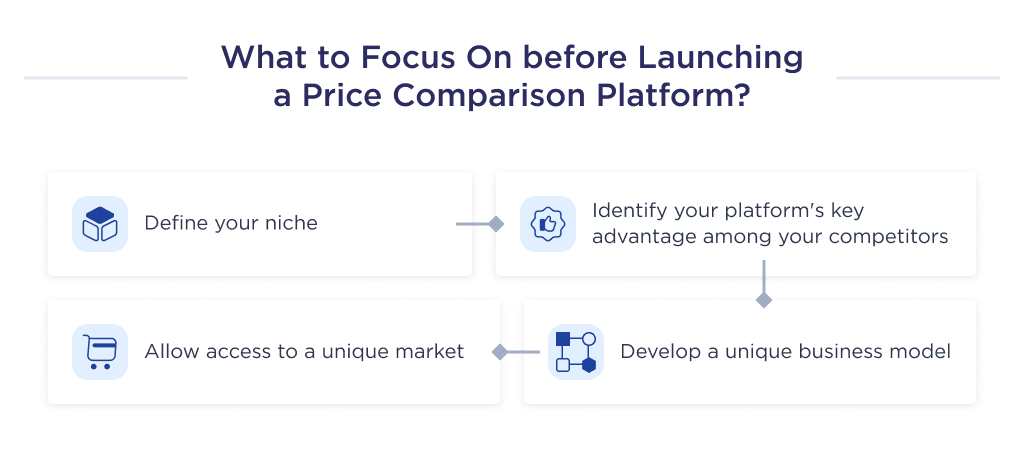
Want your website to wow visitors? Learn how to make an interactive website that keeps users engaged.
Cost to Build a Price Comparison Website
The price comparison website development cost varies from $40,000 to $80,000. It varies due to multiple factors. The two most distinct are the type of website development team and its location.
Let’s glance through the details.
Impact of Team Type on Cost
One of the factors that determine your website development cost is the type of team you hire.
We’ll base our calculation on the cost of creating a Minimum Viable Product for a price comparison platform.
| Type of a team | Average cost, $ |
| In-house | 120,000 |
| Local development agency | 180,000 |
| Freelancers | 40,000 |
| Outsourcing agency | 60,000 |
If you’re considering outsourcing, check out the benefits of IT outsourcing for insights.
Although this shouldn’t deter you from choosing a team that best compliments the organogram and objective of your startup, it’s worthy to note the key cost differences with your preferred team type and alternate.
How Team Location Affects Cost
To calculate the price, we use the same example and pricing of local development agencies.
| Location of a team | Average cost, $ |
| Australia | 110,000 |
| The US | 180,000 |
| The UK | 140,000 |
| Western Europe | 120,000 |
| Eastern Europe | 60,000 |
| South Asia | 40,000 |
Apart from the type of developers you hire, the design phase, discovery phase, and the features in your web application also affect your overall cost of developing a website.
Having acquainted yourself with the expected cost of developing your price comparison platform, let’s take a dig into the step-by-step process of creating one. 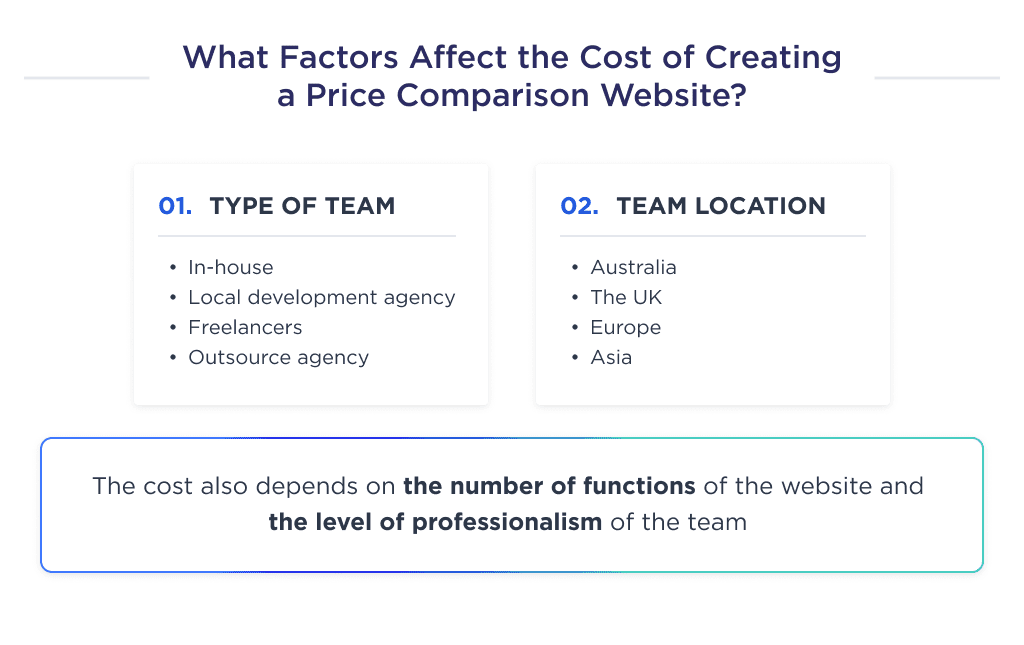
Step-by-Step Guide to Building a Price Comparison Site
Developing a highly sought-after price comparison web application requires that you have apt knowledge of the processes and technicalities involved.
To guarantee an excellent platform, ensure that your developmental process adheres to this checklist:
- Hold briefs with stakeholders
- Choose a suitable technical platform
- Identify reliable and relevant eCommerce platforms as data sources
- Product comparison site UX/UI design
- Price comparison website backend and frontend development
- Quality assurance testing
- Product launch and maintenance
This is a quite succinct checklist that might sound pretty confusing to non-technical readers, so let’s elaborate on the nitty-gritty of these steps.
Step 1: Discovery Phase
The crux of the discovery phase entails gathering project-specific information that can help achieve your startup’s goals.
The outcome from this phase will form the architectural framework for your product development process.
Beyond this, it’ll also help you identify relevant e-commerce platforms to partner with when developing the software for product comparison. Such platforms are used as providers of a web scraping service to get the latest product price changes, often utilizing a web scraping proxy to ensure efficient data retrieval and avoid restrictions.
An ideal workflow for the discovery phase of your product comparison platform should touch on the following:
- Have a conceptual understanding of the idea
- Identify the preferred niche
- Validate the idea through customer research
- Highlight the scope of work
- Set an agreeable deadline
- Create the design wireframe and prototype
This is just a brief checklist of steps to take. Let’s go into more details:
1. Understand the Founder’s Perspective
The first essential step to take in a discovery phase is speaking with the startup founder. The project manager can speak with the founder alone and convey the notes from the decision to other team members.
You may also hold regular briefs with the development team to ensure that everyone is in-tune with the founders’ objectives and goals.
2. Identify a Preferred Niche
An important part of setting up an online price comparison platform is being focused and targeting a specific niche. You can diversify when you’ve gained some expertise, but for starters, be laser targeted.
Even with the ability to pursue an explosive marketing campaign, stick to a niche that your team is familiar with, and start small.
A survey conducted by Wiser revealed that consumers mostly compare prices of:
- Electronic (90%)
- Appliances (84%)
- Food (78%)
- Streaming devices (71%)
- Clothing (71%)
If you’re opting for a niche based solely on demand, then pay attention to the intricacies of that niche to properly understand the specification and comparisons that customers make.
In particular, you can check how referral and affiliate programs or affiliate partners will work.
Try our CPM calculator to measure ad efficiency based on cost per thousand impressions.
Every startup needs a marketing strategy. Check out how to set marketing objectives correctly to reach your audience.
3. Understand the Target Audience
Once you’ve picked a niche, understand the ideal crux of that niche by discussing relevant questions with the development team. Questions to contemplate include:
- Which group mostly purchases products in this niche?
- What specifications do customers watch out for?
- How do they think?
- In what way would your solution make price comparison much seamless?
- How can you reach them?
The concept here is to find suitable answers to these questions till every member of the team properly understands the target audience.
When planning business strategy and customer outreach, the CLTV calculator gives companies a way to see the long-term revenue potential of their customer base, making it easier to plan ahead.
4. Analyze your Competitors
The price comparison sector is a highly competitive one that would have you lock horns with top brands like Shopzilla, Google Shopping, etc. As such, you should leave nothing to chance if you’d like to thrive in the industry.
Keep tabs on your competitors’ moves, and carefully analyze their business development strategy to understand their losses and gains. Doing this helps you to learn from their mistakes and prevent undesirable recurrence in your startup.
5. Have a Project Blueprint
After carrying out the stipulated analyzes above, the team’s project manager should draft a blueprint of expected deliverables. A typical blueprint for such a developmental project should entail the business development requirement and the technical objective of every team member.
The discovery phase of a price comparison website offers founders the benefit of creating a uniquely appealing product at a budget-friendly price and in a cost-efficient way.
To know better about this phase, then read this article.
With proper knowledge of the discovery phase, let’s dive right into another equally important foundational step.
If you are building a web app from scratch, check out the step-by-step process on this guide on how to develop a web application. 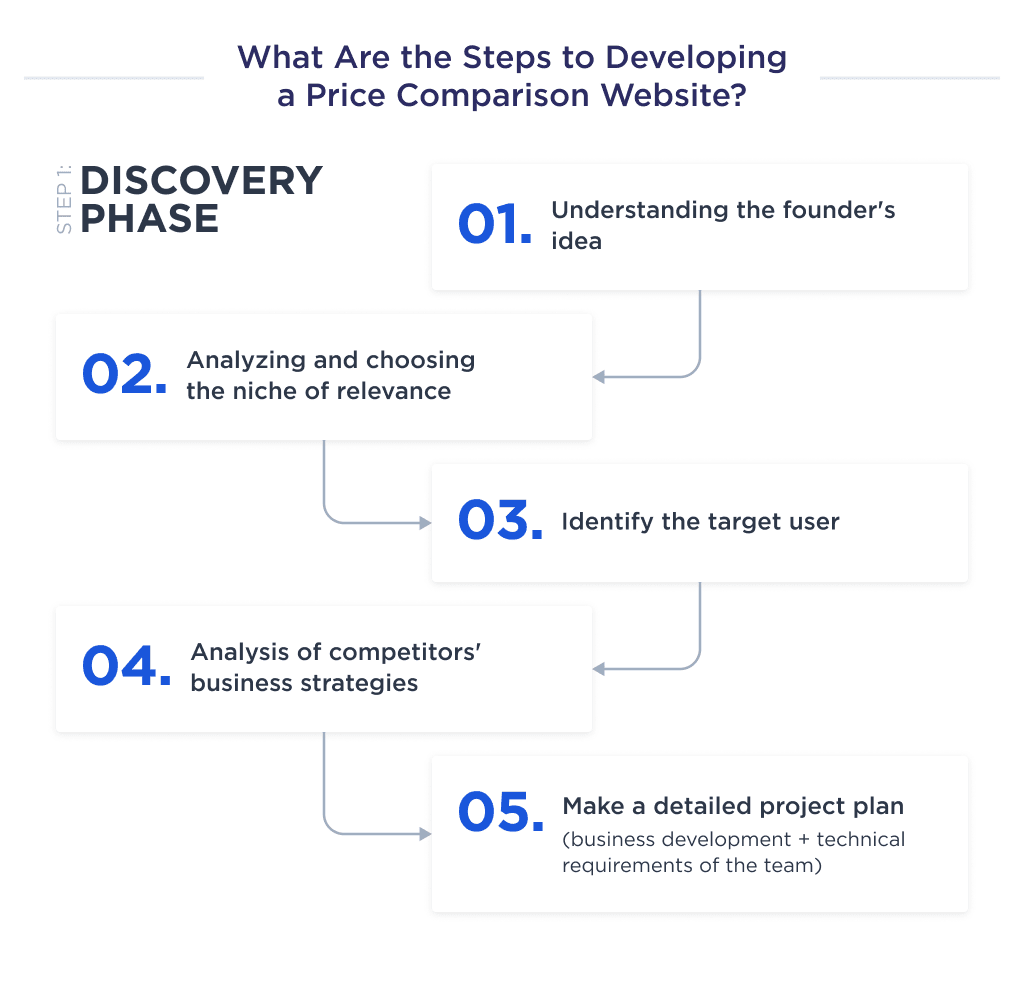
Step 2: Design Phase
The design phase is often considered an irrelevant step, but it’s actually vital to the development process core. This is because it helps to appropriately contextualize the founders’ idea into a relatable diagrammatic description.
A particular deliverable that makes this process very sacrosanct is the prototype. And this is basically because of its role in detailing the expected user experience.
Every executable icon and action in the website’s prototype are programmed independently by the programmer; thus, an error here will lead to a chain of errors in the other development processes.
The design phase helps the programmer to form an actionable guide for ensuring that all lines of code are tailored to align with the founder’s goals.
The deliverable from this phase should be a wireframe and prototype that maximizes the aesthetic and efficacy of the platform while also helping to ensure top-notch responsiveness, efficiency, and engagement rate.
This is a very brief discussion on price comparison web design to help you understand its role in the development process. If you’re willing to better understand the design phase, read the guide about website design pricing.
Right now, we’ll keep providing you with the details of price comparison website development. 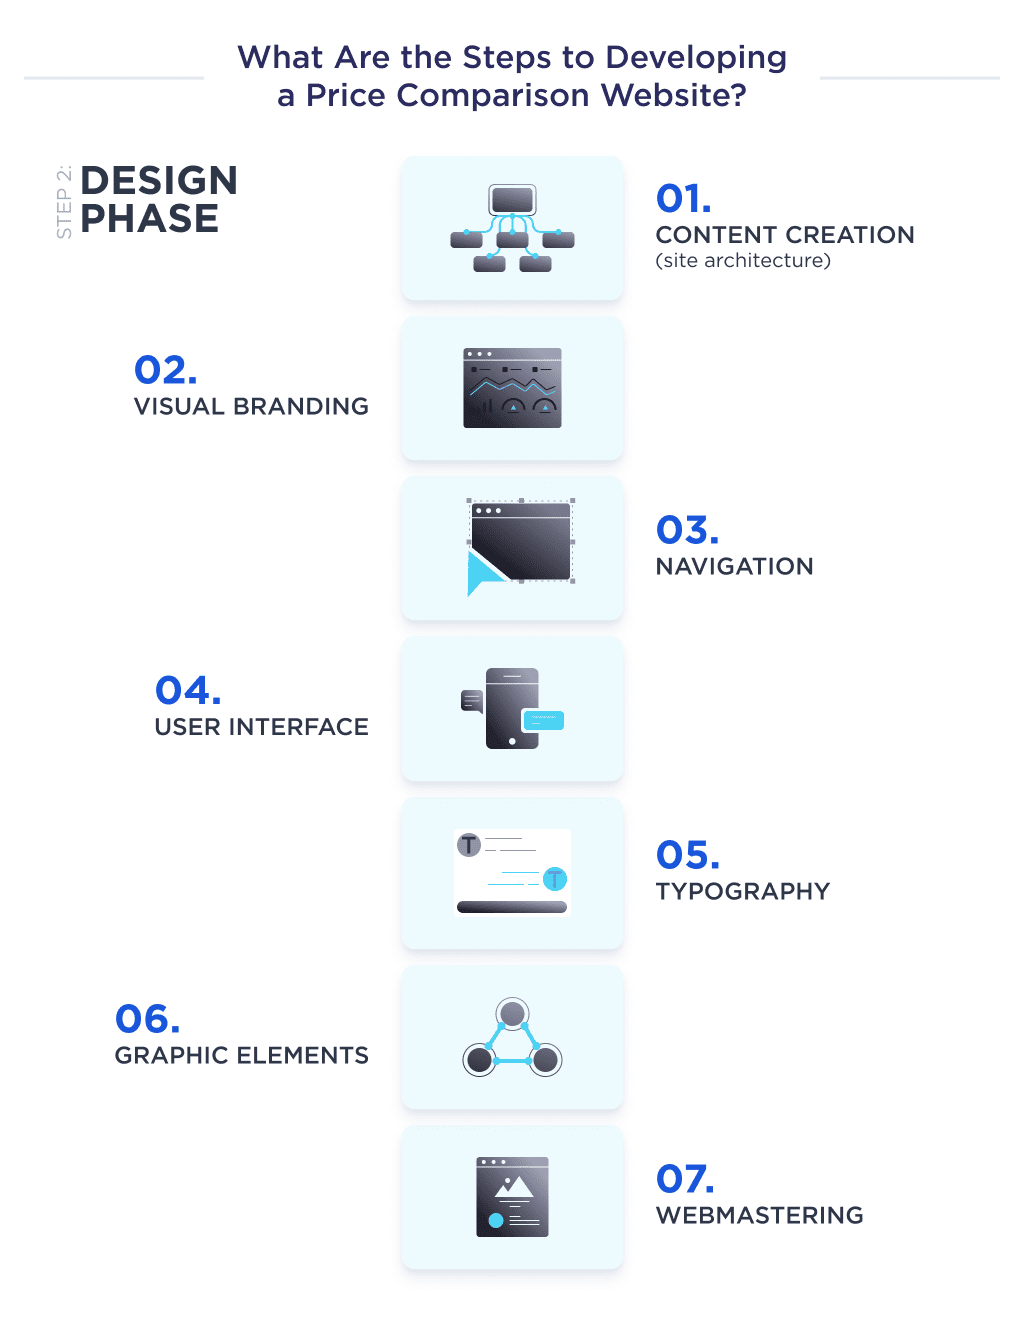
If you want to elevate your brand with the right partner — here’s how to choose a web design company for your project.
Step 3: Development and Testing Phase
This is the crux of the entire developmental process, as it involves live coding and the application of every deliverable from both the discovery and design phases. The activities in this phase are mostly handled by the backend and frontend developers.
Upon successful completion of this phase, the outcome should be an MVP or a user-oriented, fully scaled website that has all the agreed functionalities and features in the prototype.
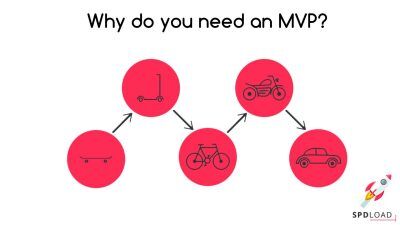
MVP, an acronym for a minimum viable product, is a basic website with all the features needed to run a preliminary test for determining the acceptability of your idea.
Once customer perception towards your MVP is satisfactory enough, then you can ask your developers to create a scaled-up product with more advanced client-centric features.
Whether you’re a startup or a seasoned pro, this guide on MVP design will save you time and money.
MVP Features for a Price Comparison Product:
| Product Features | Description |
| Sign up and Sign in | The sign-up and sign-in feature provide the means to register a customer that uses your platform and when they return. It keeps track of your user base and helps you know when each individual accesses specific features. |
| Create Profile | This feature gives customers a set of tools for customizing their profile and better managing activities on the site. |
| Listings | This feature helps the customers find the specific item/service that they want to compare. Also, it provides information on a preferred option before taking an action. The source of this data is third-party sellers’ websites, which are analyzed by search crawlers. |
| Search and Filters | An ideal website search engine should help users navigate through a database of product information. It helps to group search results into various product categories. . |
| Reviews and Rating | Review and rating features allow users to provide feedback and opinions on products’ effectiveness and suitability. Most consumers trust reviews, and they often consider them as the major determinant of purchasing activity. |
| Price history and notifications | Price history is a feature that gives consumers insight into the past prices of a product. It’s an ideal feature for individuals who regularly purchase an item and want to track the price changes. On the other hand, notifications draw platform users’ attention to successful actions that were completed on the platform. |
Let’s find out what advanced features are.
Advanced Features for a Fully Scaled Personal Comparison Website
Once your target market seems satisfied with your MVP, you can then take a step further by integrating multiple user-oriented functionalities that can guarantee a top-notch user experience. Here’s a list of some features to add:
- Social media integration
- Scanning and making dynamic QR code or barcode
- Geolocation integration
- Reward program
- Integration of payment gateway for credit card payments (Discover the best options for accepting card payments on your website in our step-by-step guide on how to accept card payment on-site)
But don’t forget that scaling MVP correctly is a major challenge for product management. Let’s take a closer look at this aspect. 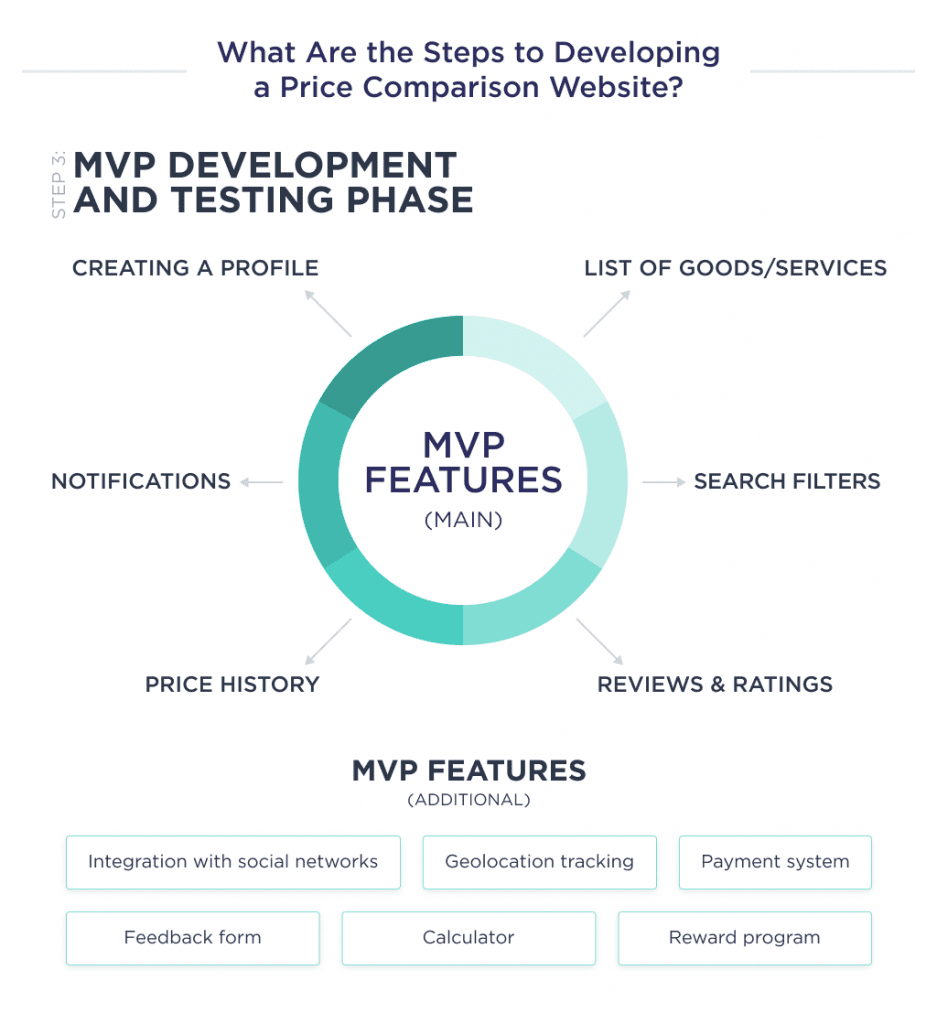
Step 4: Launch, Upgrades, and Maintenance
Now that you’ve created a highly intuitive price comparison application that appeals to your target market, what’s next? You should launch your application on app stores for easy access.
It’s a common misconception to assume that this step is nothing short of mere formality; however, it’s actually sacrosanct to the existence of your product.
It’s time to invest time and resources in getting feedback and using customers’ opinions to make customer-centric modifications.
Having a noteworthy app launch, maintenance, and improvement loop process requires a fully dedicated team of developers. Ideally, this team should run at a website maintenance budget that’s 25% of the development cost per year.
Beyond maintenance, the team may also partner with customer support to help solve technical challenges during a product search.
Irrespective of your niche market, an ideal maintenance phase in app development covers the following:
- Support & maintenance for Android, iOS, and other operating systems
- Debugging
- Constant modification of web scrapers
- Continuous API Integration
We looked at the key aspects of development. Now let’s delve into the technical nuances that we will have to face and overcome. 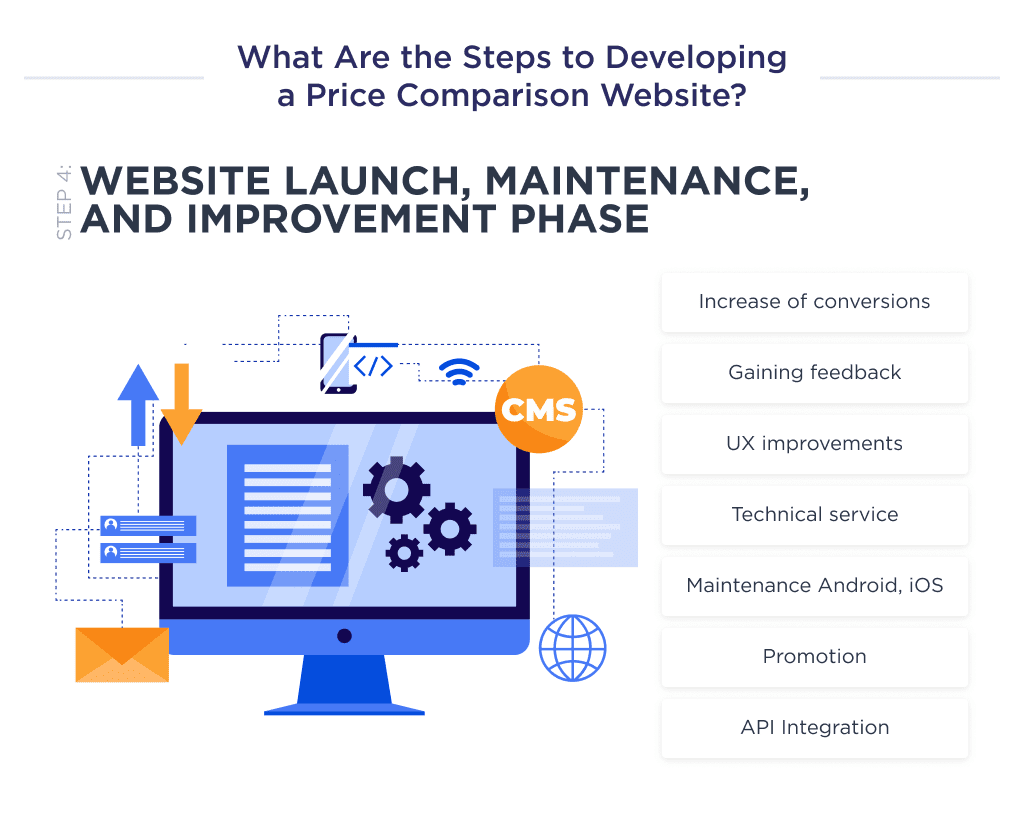
Key Development Challenges
Creating a price comparison website comes with a unique challenge.
We had first-hand experience of that when creating MyWishApp. It’s a bookmark application with a complex and advanced web scrapper under the hood.
Some noteworthy challenges we experience in the developmental process include.
1. Detecting Scrapers
A honeypot is a trap that website owners put on a webpage to catch information scrapers.
These traps are often hidden from humans but visible enough to deceive scrapers. Once a scraper falls for this trick, the web management team then forms a firewall that’ll prevent it from ever accessing the website.
2. Dynamic Content
A good number of websites use AJAX to update dynamic web content. It is a set of web development techniques that can send and retrieve data from a server asynchronously without interfering with the display and behavior of the existing page.
This creates instances where there are lazy loading images, infinite scrolling, and AJAX calls to view more data. Users can navigate through such websites to view more information but not scrapers.
And if you think that this technology applies only to complex and custom sites – no, even the template blogs on WordPress can integrate it.
Considering custom WordPress website development? We explain the benefits and what it takes to get started.
3. Complex and Changing Site Structures
Most web pages are written in XML, a specific markup language. But designers often have diverse designs for product pages; this makes them divergent in structure. When scrapping a website, there’s a need to build a unique web scraper for individual websites.
Unfortunately, most websites regularly change their web content to upgrade user experience; this renders web scraping tools redundant as a slight structural change often affects their functionality.
But how do comparison applications still manage to get platforms offering the lowest prices with this myriad of difficulties? 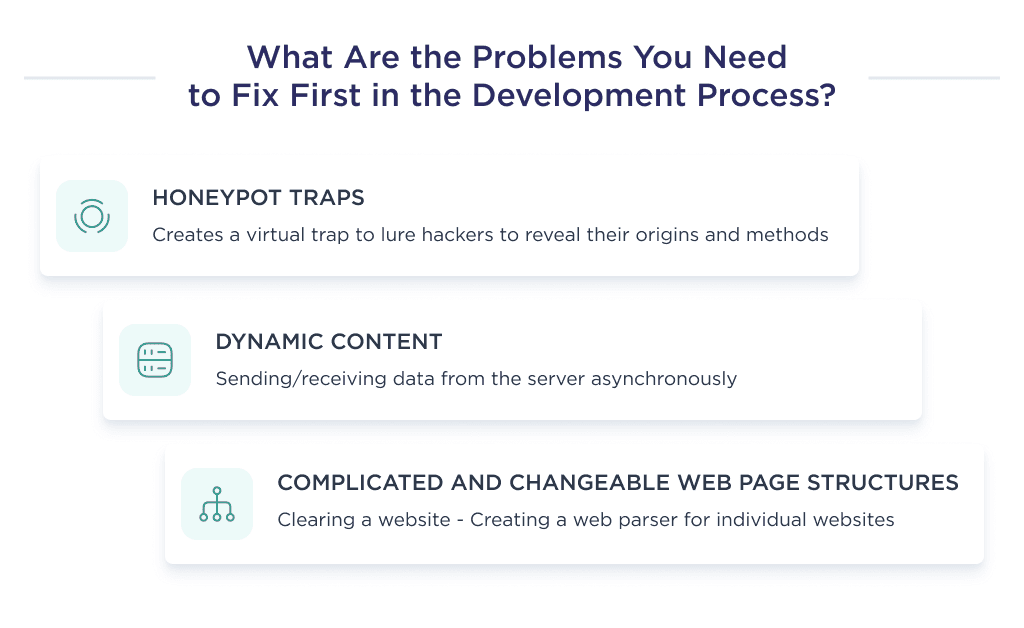
How Comparison Sites Get Product Data
In the discovery phase of MyWishApp, we were able to identify some reliable ways of sourcing data for our platform. Here’s a highlight and the pros and cons of some methods we identified:
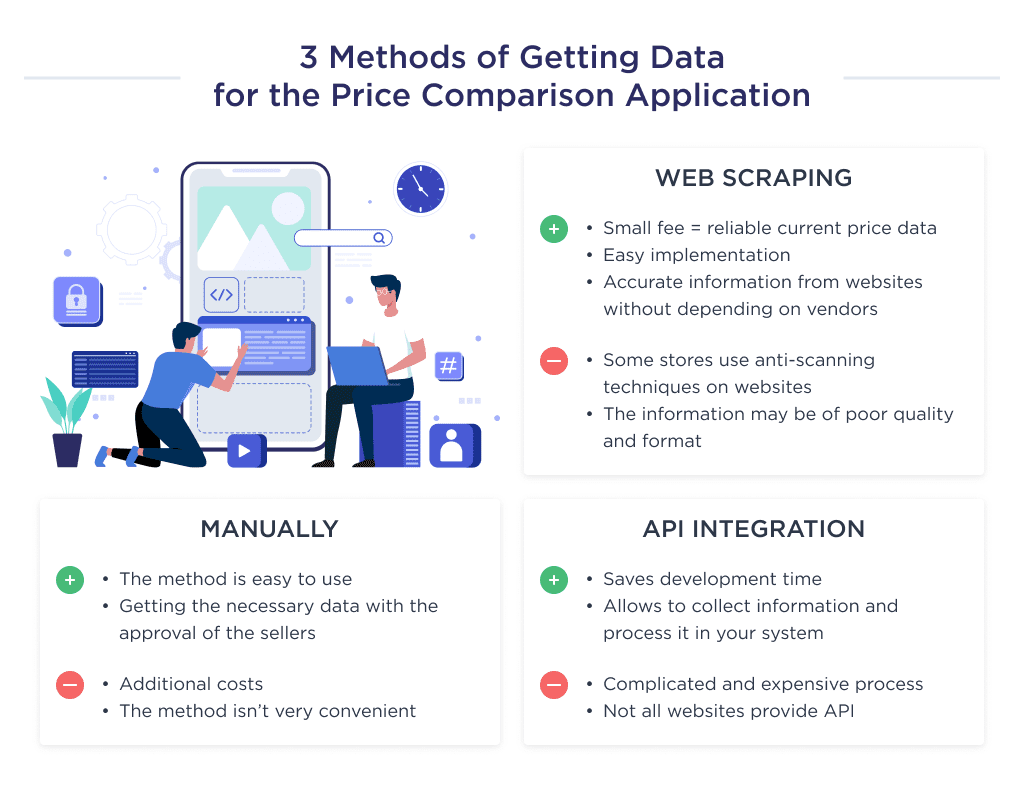
Method 1: Manual Addition
This method entails manually sending requests for detailed information about the product catalog of eCommerce websites, e.g., Amazon, eBay, etc., and typing those details via the admin portal of your app.
Looking to launch an eCommerce business? Check out these eCommerce startup ideas for fresh inspiration.
We discovered some pros and cons after a detailed analysis of this method. Here are a few of them:
| Pros | Cons |
|
|
Method 2: APIs
This method involves integrating APIs from retailers’ websites into your application. The received product data is automatically integrated into your database and called out from your website’s backend anytime a user performs a search.
Some pros and cons of this method include:
| Pros | Cons |
|
|
Method 3: Web Scraping
This data extraction process helps to obtain information that appeals to online shoppers in the most seamless way possible. It involves creating web scrapers or partnering with a web scrapping service to visit specific URLs to obtain relevant information.
However, it’s important to note that web scraping can sometimes lead to IP blocks or CAPTCHA challenges, which can be frustrating and time-consuming to deal with.
This is where paid web scraping API tools (such as ScrapingBee or Zyte API) come in handy, as they can extract data without the risk of getting blocked.
This makes the data extraction process not only seamless but also reliable, providing your business with the valuable insights it needs to stay ahead of the competition.
For example, Amazon scrapers are particularly useful for monitoring product prices reviews, and inventory levels, enabling data-driven decision-making.
Here are some pros and cons about this method to consider:
| Pros | Cons |
|
|
To achieve the development steps above, you must have the right team combination with apt knowledge of the right web stacks. Let’s go into more details of this below:
Required Team
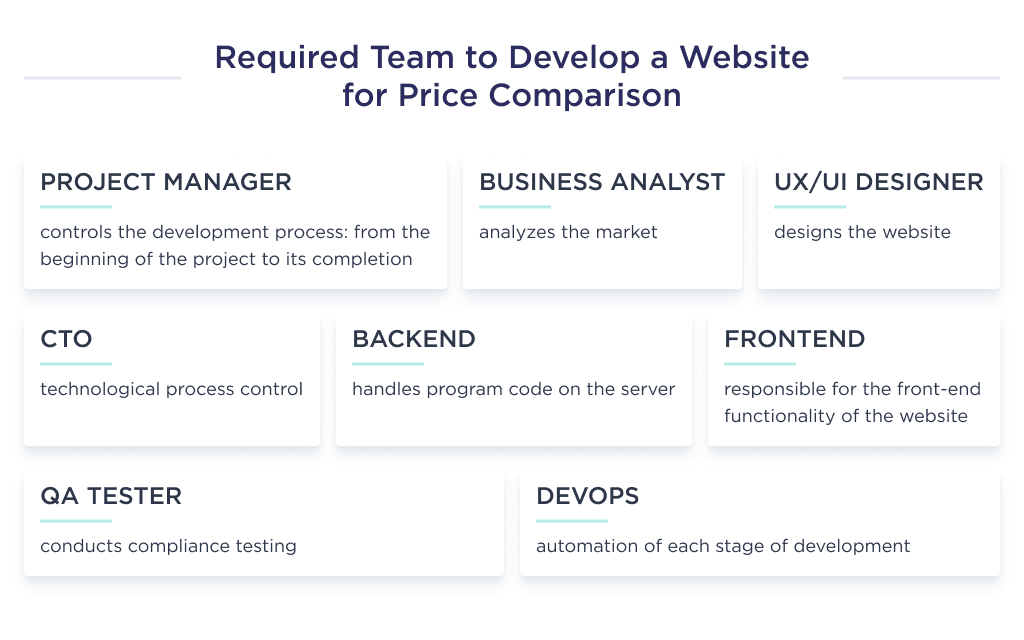
The team of developers needed to bring your concept from ideation to reality is;
| Required Team | Job Description |
| Project Manager | The project manager is saddled with the responsibility to plan and oversee the development process and guarantee its timely completion. He/she designates resources, prepares a budget, monitors progress, and regularly communicates with stakeholders. |
| Business Analyst | The business analyst conducts market analyses, analyzing both the market readability for the product and its overall profitability. |
| UX/UI Designer | The UX/UI designer helps to design the website, map out customers’ experience, and the product’s interface. |
| CTO | The CTO helps to oversee the entire technological process embarked on by the backend, frontend, and mobile developer. He/she supervises the entire coding process and ensures that every step aligns with a given objective. |
| Backend developer | The backend developer creates, codes, and improves the server, server-side applications, and databases. |
| Frontend developer | The frontend developer determines the structure and design of web pages strikes a balance between its aesthetic and functional design and ensures the platform’s proper optimization. |
| QA Tester | The QA tester runs various tests on software to ensure that it meets all guidelines and standards. |
| DevOps | The DevOps build, test, and maintain the tools and infrastructure needed for speedy release and development of the software. If you want to learn more about DevOps specialists, check out our DevOps glossary that covers key terms to help you stay on top of DevOps practices and tools. |
Needed Tech Stack
In building MyWishApp, we used a compendium of tech stacks which include:
| Feature | Tech Stack |
| Backend Development | Laravel, NodeJS |
| Frontend Development | React, Vue.js, Nuxt.js |
| Server | AWS, Redis, Kubernetes (discover the strengths and weaknesses of Digital Ocean, AWS, and Google Cloud to find your ideal match) |
| 3rd Party Integrations | Facebook Login, Facebook Analytics, Google Firebase, SMSC, AppsFlyer |
| Mobile | React Native, Swift, Java |
Struggling to pick technologies for your project? Discover how to choose a tech stack with our expert advice. 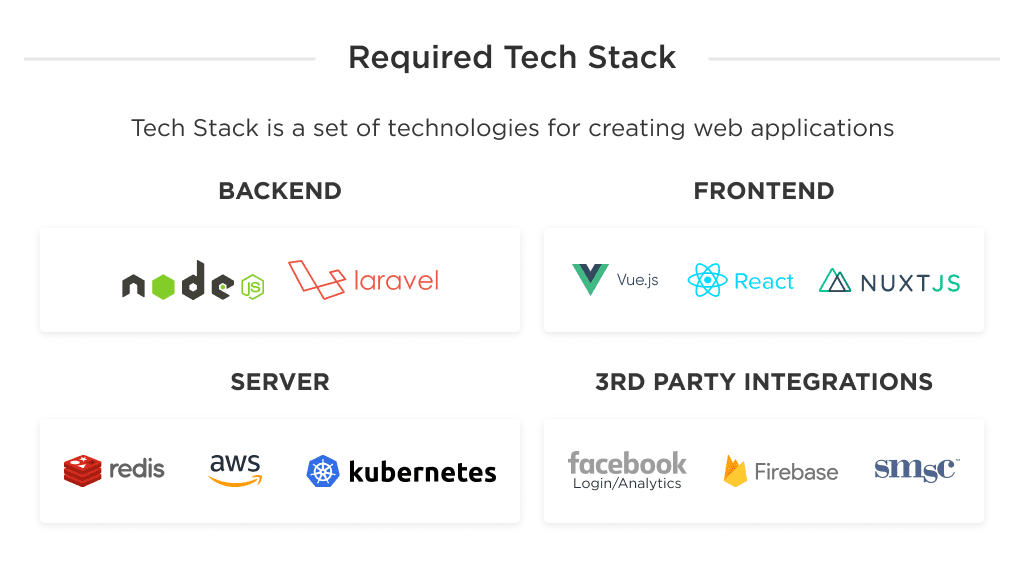
Discover the best Laravel tools and resources for developing robust web applications.
Hiring Laravel talent doesn’t have to be hard. Check out this comprehensive guide on how to find a Laravel developer.
Looking for a Reliable Development Partner?
There you have it — everything you need to know to build a successful price comparison website.
Now, it’s time to turn that vision into reality by finding an experienced development partner.
At Spdload, an expert team is ready to bring your price comparison site to life. We’ve delivered solutions for startups and enterprises alike, specializing in the exact skills needed for price scraping and comparison apps.
Ready to see what we can build together? Browse our case studies and Clutch reviews firsthand accounts of our development capabilities.
Then, let’s connect to kickstart your project! Reach out today to schedule a consultation.
Bonus Infographic
Here’s a summary of our in-depth guide. Learn the highlights of the process of creating a price comparison website from scratch.
Wondering do I need a website for my business? Find out why the answer is almost always yes. 


